Showing posts with label AS3. Show all posts

Sunday, June 15, 2014

How to make a screenshot in the games with Starling Framework?


Yep. Making a screenshot in the mobile games is a piece of cake. In the mobile devices (either iOS or Android), you could press the home button and the lock button simultaneously to achieve it.

However, sometimes we may want to implement this screenshot function inside the games. Reason? To capture a specific region of the screen.

Here, i am talking about using the Starling version 1.4.1 (will update soon with the 1.5.1).

In fact, with some searches, you may come across some articles about making a screenshot easily. But the thing is, in my opinions, those aren't complete enough. Below shows the complete snippet of codes of doing it.


1. Generate a BitmapData with a single line of code

var screenBitmapData:BitmapData = Starling.current.stage.drawToBitmapData();

To our delight, the latest Starling Framework has performed all the dirty works for us, with the 'drawToBitmapData()' function.

2. Encode the BitmapData and store it inside the byte array

var arrbyte:ByteArray = new ByteArray();
screenBitmapData.encode(new Rectangle(0, screenBitmapData.height/2, screenBitmapData.width, screenBitmapData.height/2), new JPEGEncoderOptions(), arrbyte);

Here, what i am doing is that i store the bitmap data inside a byte array, with some parameters such as the dimensions and the type of compressions (jpeg).

3. Write the array bytes into the File System

var fileHandle:File = new File(File.documentsDirectory.url + "/Pictures/YourGame/" + "Filename.jpg");
var fileAccess:FileStream = new FileStream();
    fileAccess.open(fileHandle,FileMode.WRITE);
    fileAccess.writeBytes(ba,0,ba.length);
    fileAccess.close();

With the byte array, you can perform the last step - Saving inside the file system. Here, you may specify which directory and the file name as you wish.

Is that all? Something missing?
Yep. There is one more question: How to generate unique file names for unlimited screenshots?
It isn't complicated after all. Just a reminder, you may use the "Current time" for the file naming purposes. For example:

var currentDateTime:Date = new Date();
var strRandomFileName:String = currentDateTime.toUTCString();

With this, the task of making screenshots is thoroughly complete. Hope this helps :)

Friday, February 28, 2014

Running Man Rock Scissors Paper Game is in the Google Play Store Now!

Yay! The Running Man Rock Scissors Paper Game is now available in the Google Play Store!


As the RM maniacs, we all know that there are 2 types of Rock Scissors Paper Games which are popular in the Running Man Variety Show:
a) Ka-wi Ba-wi Bo (가위 바위 보)
  • A normal Rock Scissors Paper Game. Ka-wi (scissor), Ba-wi (rock), Bo (paper). 

b) Muk-jji-ppa (묵찌빠
  • This is a Korean modified Rock Scissors Paper Game (eg: Refer Episode 147).
  • To play this Muk-jji-ppa game, there are at least 2 rounds.
  • In the first round, it is a normal Rock Scissors Paper.
  • The winner of the first Round has to make the opponent's hand same as him/her in the second round in order to win the Muk-jji-ppa
  • If there isn't a winner in the second round, the process is repeated.
In the Running Man Rock Scissors Paper Game, the game has been designed such that the winner of either the Ka-wi Ba-wi Bo or Muk-jji-ppa has to 'attack' his opponent (which is actually the Running Man Members) with the toy hammer (refer Episode 166). Meanwhile, the loser of the RSP has to protect himself from being attacked by using the pot shield. In order to defeat the RM member and unlock the stronger one, you need at least hit the opponent 3 times.

Something to note is that, this Running Man Rock Scissors Paper Game has no offense to any RM member. The stats is simply based on personal opinion.

Also, since a number of users don't like the Adobe AIR 4.0 plugin, this game is using the Adobe AIR 3.7. Before the awareness of the Adobe AIR 4.0 is getting popular, we would only use the lower version.

Sunday, February 23, 2014

Flappy Bird Algorithm Part 4 - An Android Game Demo (Floppy Balloon)

With the previous Flappy Bird Game Algorithm, I believe you would be able to come out with something similar.

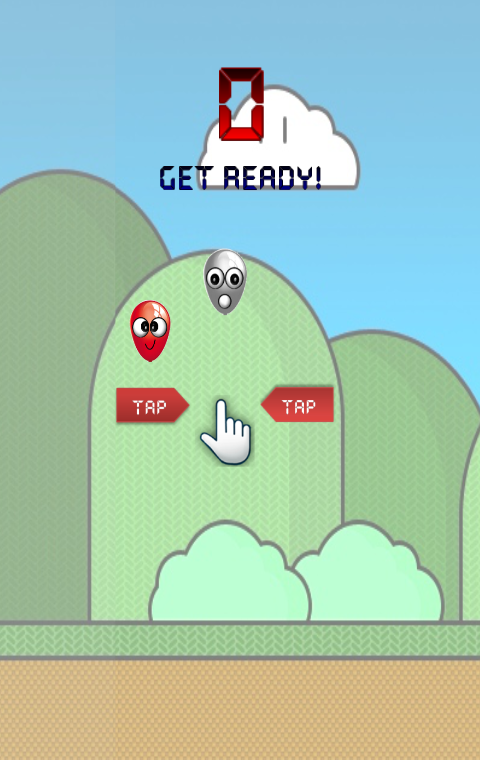
So, here is my published version of the Flappy Bird - Floppy Balloon.

In the Floppy Balloon, i have made the game relatively simpler. And there are 2 modes: Easy and Hard. In the Easy mode, the forward speed of the balloon is slower, and the interval of the obstacles is longer, and you only get 1 score after going through 1 barrier. While in the Hard mode, the pace is increased and you will be rewarded 2 scores for each obstacle that you go through.


Again, to remind that there is a need to perform a 'one-time-only' installation of the latest Adobe AIR app.

Any feedback is welcome~


Thursday, February 20, 2014

Flappy Bird Game Algorithm Part 3 - Collision Detection

So far we managed to make an object flying smoothly with the adjustable gravity and the forward speeds.

Next, it comes the major part of the game: Obstacles generation and Collision Detection

Note that the obstacles (tunnels/pipes) can be generated in the similar ways as the background movement. Now the thing is, how to know if our flying object hits them?

To put it in a better picture, let's have a look at the analogy below:


Here, to investigate whether the object hits both the pipes (upward and downward), it is to check  whether the object is not successfully contained 'inside' the green box region (on the right side).

With this understanding, we only require a few information to complete the task:
a) Coordinates of the flying object + its Width and Height
b) Coordinates of the green box region  + its Width and Height

Luckily, the Width and the Height of the object and the green box are constants. All we need to perform, is a fundamental collision checking, as shown in the function below (Again, it is inside the onEnterFrame function):

public function collisionDetection(_obj1:FlyingObject, _obj2:GreenBox):Boolean
{
     //*Note that my flying object is pivoted in the center
     //check if it is within the pipes
     if(
_obj1.x + obj1.width/2 >= _obj2.x &&
        _
obj1.x + obj1.width/2 <= _obj2.x + _obj2.width)
     {

         //hit upper pipe
         if( _
obj1.y - _obj1.height/2 <= _obj2.y)   return true;
           
         //hit lower pipe
         if( _y1 + _
obj1.height/2 >= _obj2.y + _obj2.height) return true;
     }

}

Straightforward enough. Hopefully with these ideas, you can design and customize the Flappy Bird Game in anyway you want.

Next : Flappy Bird Game Algorithm Part 4 - An Android Game Demo (Floppy Balloon)

Flappy Bird Game Algorithm Part 2 - Background movement

With the ability to make the gravity, now let's enable the background movement.

Just FYI, in the Flappy Bird Game (or any spaceship game), it is the background that moves at the opposite direction which causes the illusion that the main object is flying. It is the typical way of creating such an effect.

Here, i am taking a Super Mario-like background image from here. To make it move smoothly at the back, we need at least 2 background images, which i crop the originals into 2 pieces, as shown below (bg1 and bg2):

Bg1 and Bg2, each pivoted at the top left red point.

At the beginning, the first part of the image (bg1) is shown (filling the device), while the second part (bg2) is placed just after the first image.

Then, with the Event.ENTER_FRAME again, both background images are moved slowly to the left. When the bg1 is completely vanished from the screen, its location (x) is moved to the end of the screen again. The same process is repeated to the image bg2 as well. And the entire process is looping forever.

Not surprisingly, in the onEnterFrame function of the background object, the function is as brief as below:

private function onEnterFrame():void
{
      this.x -= GamePlay.GAME_SPEED;
           
      if(this.x < -
DEVICE_WIDTH)   this.x = DEVICE_WIDTH;
 }

Next: Flappy Bird Game Algorithm Part 3 - Collision Detection

Wednesday, February 19, 2014

Flappy Bird Game Algorithm Part 1 - Gravity and flying


Normally, to create the games involving Physics (eg: gravity), the use of Physics Engine such as Box2D would be a boost for complicated run-time computations. However, in the Flappy Bird game, since the only requirements are to:
  • Make the bird fly upwards while touching
  • Make the bird fall while not flying (with gravity)
the algorithms could be performed easily with few lines of codes without Box2D.

Here, to remind, I am using AS3, Starling Framework and a latest version of Adobe AIR (4.0).

First, I am taking the advantage of Event.ENTER_FRAME to allow the flying object to animate/fly on each frame. In the onEnterFrame function, a gravity is implemented. At the same time, we allow the player to touch any space on the device to activate a 'jump'.

private const UPWARD_SPEED:int = 5;
private const MAX_FLOOR:int = 800; //an indication that it hits the ground
private const GRAVITY:Number = 0.5;
private var objFlying:FlyingObject = new FlyingObject();//and addChild
private var speed:Number = 0; 
private var isJump:Boolean = false;
private function onEnterFrame(e:EnterFrameEvent):void
{
     if(isJump)
     {
         speed = -
UPWARD_SPEED; //negative relative to the normal gravity
         isJump = false; //once a jump is activated, we disable the flag
     }
     speed += (
GRAVITY); //physics ya, the speed is affected by gravity
    
objFlying.y += speed;
           
     if(
objFlying.y > MAX_FLOOR) //if it hits the wall
     {
         speed = 0;
        
objFlying.y = MAX_FLOOR;
     }  

}

private function onTouch(e:TouchEvent):void
{
     ...
     var touch:Touch = e.getTouch(stage);
               
     if(touch.phase == TouchPhase.BEGAN)
     {
          isJump = true; //a touch enables a slight jump
     }   

}

Note that the upward speed, gravity and the floor location are tunable according to your needs. With the Event.ENTER_FRAME, the animation is an easy job.

Next: Flappy Bird Game Algorithm Part 2 - Background Movement

Saturday, January 4, 2014

Workaround for adjusting image brightness in the Starling Framework

In the Starling Framework, there isn't a property of 'brightness' for the Image Class. As a result, there is no straightforward approach when adjusting the image brightness.

However, we tend to have the feature of image glowing or flickering to attract the users, especially in the games. How to achieve the effects? Fortunately, with the understanding of the onEnterFrame function, there is a simple workaround here.

First, you need to define another class (extending Sprite) in which the images (that you want to flicker) are added. Here, ONLY 2 images are required: a normal image and a brighter image of the identical objects, as shown below:


Then, inside the onEnterFrame function, all you need to do, is to add a harmonic function (sine, cosine or tangent) to adjust the transparency (alpha) of the either one image, as stated here:

      public const FLICKER_FREQUENCY:int = 1000;
      public var yourImage1:Image = new Image(...);
   public var yourImage2:Image = new Image(...);
   
   private function onEnterFrame():void
   {
        var curDate:Date = new Date();
        yourImage.alpha = (Math.cos(curDate.getTime()*(1/
FLICKER_FREQUENCY)));
   }

Simple enough. You can adjust the flickering frequency at any rate you want :)

Wish to see a real example? There you go. The effects of adjusting the image brightness is applied in my Match 3 Pop Saga game. The flickering balloons are formed when you perform matching of 4 balloons in a row.

Sunday, December 29, 2013

Match 3 Game algorithm Part 6 - A real Android Match 3 Game demo

Sorry for the late. The release date for the Match 3 Game as stated last time might be delayed a bit.

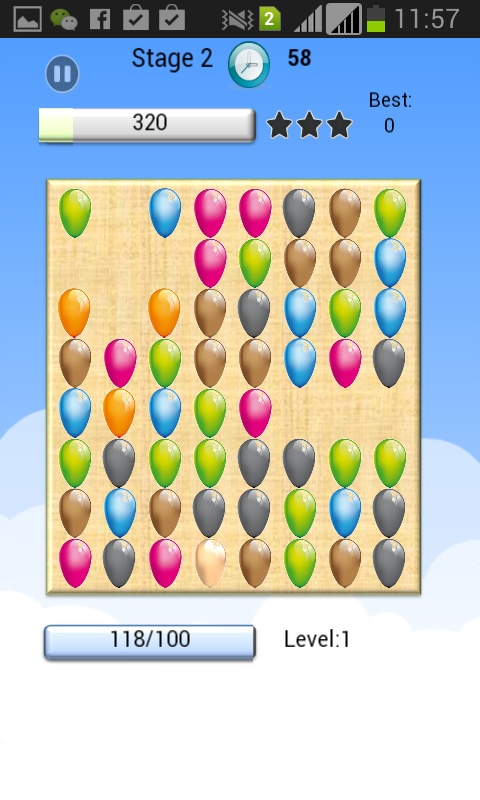
HORRAY! The Match 3 Pop Saga is now available in the Google Play Store Now!


After several weeks of hard work, i have finally come out with a 'sample' of the Match 3 Game, with the Candy Crush Saga as the main reference, and the algorithms stated previously. (The "Saga" is imitated to gain some SEO points, hopefully... oops)

However, different from the Candy Crush, my Match 3 Pop Saga only has a total of 9 stages. Furthermore, it includes a bit of RPG elements: Level up. Basically, the more you play (popping more balloons), the higher levels you are. And the higher levels will reward you a higher score per pop (and time too!). Interesting huh? :)


Note that it is a balloon, not a colorful Easter egg.
I am not a graphic designer. The pictures are obtained from devianart.

Something to note is that, the 'striped candy' now is a glowing balloon (right, simple animation), while the 'wrapped candy' is something like this (bordered):

The maximum level in the Match 3 Pop Saga is 15 (which i think you won't need that for completing all the stages with 3 stars).

Finally, thanks for trying this game. Feel free to drop some feedback, either on the game flow, or the game experiences~

Tuesday, December 24, 2013

Actionscript ProgressBar DIY in Starling Framework

The Starling Framework doesn't come with the built-in Progress Bar, but the Feathers framework does.

However, i find that it isn't that hard to create a progress bar ourselves, and to be used with the Starling Framework.

Here, what we need to do is to create a ProgressBar class:

    public class ProgressBar extends Sprite
    {
        private const BAR_WIDTH:int = 100;
        private const BAR_HEIGHT:int = 30;
        public var qdMax:Quad; // a static bar
        public var qdMove:Quad; // a moving bar
       
        public function ProgressBar()
        {
            this.addEventListener(Event.ADDED_TO_STAGE, onAddedToStage);
        }
       
        private function onAddedToStage():void
        {
            this.removeEventListener(Event.ADDED_TO_STAGE, onAddedToStage);
           
            qdMax = new Quad(
BAR_WIDTH,BAR_HEIGHT,0xf0f0f0);
            qdMove = new Quad(1,
BAR_HEIGHT, 0x990000);
            addChild(qdMax);
            addChild(qdMove);
        }
       
        public function updateBarMove(_ratio:Number):void
        {
            qdMove.width = (_ratio)*qdMax.width; //adjust the width
        }
    }

Here, we have a very simple class. The main thing to note here is that, there is a function updateBarMove which takes the parameter of a 'ratio', ranging from 0 to 1, and is to be called from time to time to update the visual bar status. Any example of using this? Here it is:

How to show the progress bar while playing the audio files in Starling Framework (AS3)?

Yup, with the class defined above, we can easily display the progress of the audio files when it is played or paused. Here's the original source as your reference. Now with the onEnterFrame function, it can be performed with ease.

So, assume that you have a button switching from "play" to "pause" and vice versa. When it is "played", we dispatch the Enter Frame Event, as shown below:

      public var pBar:ProgressBar;
    public var sound:Sound;
    public var sc:SoundChannel = new SoundChannel();
    public var musicLength:int;

       private function onEnterFrame(e:EnterFrameEvent):void
    {
       var ratio:Number = sc.position/musicLength;
           
       if(ratio >= 1) //when the audio playing finishes
       {
           sc.stop();
           sc = sound.play(0);
           sc.stop();
           this.removeEventListeners(Event.ENTER_FRAME); //stop updating
       }
           
       pBar.updateBarMove(sc.position/musicLength); //passing a ratio
   }


Here you go, the progress bar is created!

Saturday, December 21, 2013

How to load TextureAtlas with the AssetManager in Starling Framework?

From the Hsharma's tutorial, we have learned that using a Sprite Sheet to load the textures is crucial to ensure a great performance. Next, you may want to ask, if the Sprite Sheet is too big to be loaded at run-time, are we able to tell the users, "hey, we are loading the resources, please wait a minute" to serve as a buffer before we proceed to the next screen/activity?

Good news. Tracking the process of loading the textures or other assets is made possible with the AssetManager class in the Starling Framework. In fact, the original tutorial could be found at here. In this post, particularly, i would like to show how to load TextureAtlas with the AssetManager.

Similar to loading the normal textures, to begin loading the TextureAtlas, let's have a class EmbeddedAssets.

public class EmbeddedAssets
{
     // Texture
     [Embed(source="../media/graphics/mypng.png")]
     public static const mypng:Class;
       
     // XML

     [Embed(source="../media/graphics/myxml.xml", mimeType="application/octet-stream")]
     public static const myxml:Class;

}

In the EmbeddedAssets class, we embed the TextureAtlas and the TextureXml as usual. Yup, just embed them as usual. Then, we could just use the AssetManager to load it (with the enqueue function).

public var assets:AssetManager = new AssetManager();

.....
assets.enqueue(EmbeddedAssets); //yes, enqueue the entire class
assets.loadQueue(function(ratio:Number):void
 {
    trace("Loading assets, progress:", ratio); //track the progress with this ratio
    if (ratio == 1.0)
          initGame();
 }); 


 Finally, in the initGame and the subsequent functions, we are able to load the texture with the function getTexture. For example, assume that you have a texture named "playButton" in the TextureAtlas, you can easily load it with the line below:

 var texture:Texture = assets.getTexture("playButton");

Isn't that very convenient?

Friday, December 20, 2013

Creating a timer with the Actionscript onEnterFrame

For those who are Actionscript-savvy, the "onEnterFrame" Event is a familiar term. It is in fact an elegant way of handling the animations in the game.

This post, is particularly a demo of how do i use the AS3 "onEnterFrame" to replace the class Timer (which is in the package flash.utils). You might think that this is redundant. But i really favor the way the "onEnterFrame" perform this with ease, while you can implement the other animations simultaneously.

Here's a snippet of the "onEnterFrame" function. What it does is that, the object is able to perform an animation A on each frame, while performing another animation B at an interval of one second (adjustable).

private var timePassed:Number = 0;
private var startInt:int = 1;
private function onEnterFrame(e:EnterFrameEvent):void
{
     timePassed += e.passedTime;
     if(startInt < 10)
    {

         //doAnimationA();
         if(Math.floor(timePassed) == startInt)
        {
             startInt++;

             //doAnimationB();
        }
     }
     else
    {

        this.removeEventListeners(Event.ENTER_FRAME); //clean the event
     }
 }

One thing to note is that, the data type of the timePassed has to be "Number", but not "integer". In the code, after passing 10 seconds, the enterframe event is removed.

Monday, December 16, 2013

Sound effect resources for Android Games

In case you are wondering where to look for free sound effect resources for Android Games, here i have a recommended link.

There are 3 main reasons i pick this sound effect resources instead of the others:

a) Resourceful solutions

The different types of sound effects are categorized clearly at the left, listing:
  • Pickup/Coin - eg: Mario Coin
  • Laser/Shoot - eg: Space shooter
  • Explosion - eg: tower defense bomb
  • Powerup - eg: RPG level up
  • Hit/Hurt - eg: Streetfighter / King of fighter attack
  • Jump - eg: Mario jump
  • Blip/Select
  • Randomize
  • Mutation

b) Intuitive and flexible

By clicking the button, it will generate a sound effect of your choice. Each click will generate a different sound. Basically you can perform unlimited clicks until you hear the one of your favorites. Furthermore, Each sound effect generated is tunable with a number of attributes:
  • Attack Time
  • Sustain Time
  • Punch
  • Decay Time
  • Compression
  • Frequency
  • Frequency cutoff
  • etc ....

c) Free for all

If there is a Facebook "Like" button, or a Google "+" button, i won't be hesitating to share this to all my friends. You can easily export all the sound effects generated for free. YES, you are not reading the typo. There are really some Samaritans out there researching and creating free products for us!

I believe most of us are not sound engineers, so having this resource would be definitely a helpful one.

Note: If you are going to load the sound effects into the Flash Builder, remember to perform the up-sampling / down-sampling the frequency of the audio files with the appropriate software, as mentioned in previous post.


Thursday, December 5, 2013

How to set the frame rate in the Flash Builder Actionscript project?

In some of the games such as Tower Defense or RPG, a consistently high frame rate is necessary to maintain a smooth display of the animations. By default, an Actionscript project in the Flash Builder has a frame rate of 25. This is barely enough for a few movements on the screen. If there are tonnes of bullets or enemy armies bombarding the screen display, the players will experience a horrible game play experience (and most importantly, rate your game badly....)

So, setting the game frame rate is necessary. To do that, you need to include a simple SWF meta tag above your class definition (and AFTER your library import), as stated below:

package
{
    import flash.display.Sprite;
    import flash.display.StageAlign;
    import flash.display.StageScaleMode;
    import flash.geom.Rectangle;
   
    [SWF(frameRate="60", width="640", height="960",backgroundColor="0xffffff")]
    public class YourGame extends Sprite
    {
        public function YourGame()
        {


           ....

In the code, make sure you have your SWF meta tag written just before your Class. Here, a frame rate of 60 is chosen. Apart from the frame rate, you can set other configurations as well, such as width, height, background color, etc.

One thing to note is that, the effect of the frame rate "may not" be reflected if you are in the debugging mode with the Adobe AIR simulator. Therefore, don't be surprised if you still observe some lagging when debugging the game. Everything will be alright when you "Export Release Build".

Tuesday, December 3, 2013

How to crop an image with the Starling Framework?

So this is the post of how to perform image cropping on run-time in Starling Framework (AS3).

Allow me to grab any random image from the web for demo purposes, as below:


Question: how to crop the car image above? (Its original size is 300px width, 150px height). The final result is only the center car image.

The action is similar to cropping it with Microsoft Office Picture Manager, as shown below:

But how is it done in AS3 code?

First, let's have a look at the important function setTextCoords stated here.
Sets the texture coordinates of a vertex. Coordinates are in the range [0, 1].

To put the explanation of the function in a clearer picture:

Here, the vertex ID (first parameter) of a picture starts from top left, which is 0.
vertex ID 1 - Top right
vertex ID 2 - Bottom left
vertex ID 3 - Bottom right

Then, the coordinates (second parameter) simply means at which point of the image should the vertex be located. The allowed coordinates are in the range of [0,1]

So, let's see how we want to crop the image. As we can see above (the picture of Microsoft Office Picture Manager), i crop the image with the following criteria:
a) Left: 50px
b) Right: 50px
c) Top: 35px
d) Bottom: 10px

By converting them into the proper value (from 0 to 1), now we have:
a) Vertex 0th: (50/300, 35/150)
    - coordinates (1/6, 7/30)
b) Vertex 1st: ((300-50)/300, 35/150)
    - coordinates (5/6, 7/30)
c) Vertex 2nd: (50/300, (150-10)/150)
    - coordinates (1/6, 14/15)
d) Vertex 3rd: ((300-50)/300, (150-10)/150)
    - coordinates (5/6, 14/15)

Hence to crop the image with AS3, we just need the few lines below:

var bitmap:Bitmap = new car(); //assume you have embedded the car image
var myTexture:Texture = Texture.fromBitmap(bitmap);
var img:Image = new Image(myTexture);
img.setTexCoords(0, new Point(1/6, 7/30));
img.setTexCoords(1, new Point(5/6, 7/30));
img.setTexCoords(2, new Point(1/6, 14/15));
img.setTexCoords(3, new Point(5/6, 14/15));
addChild(img);

Isn't that easy? At last, remember to set the width and height of your final image. Else, the cropped image will have the size similar to the original one (which would be undesirable).

Wednesday, November 27, 2013

How to handle multiple resolutions / multiple screen sizes with the Starling Framework?

One of the great reasons that i choose Adobe AIR and Starling Framework as my favorite tool to create Android Games is that, it can be easily customized to support multiple resolutions for multiple screens. Honestly,  if you are going to design and re-size every single image of your games for all the Android devices, it is going to make your life much more miserable...

So, actually the complete guide to support multiple resolutions is stated clearly here, which includes the 3 strategies:
a) Stretching the stage
b) Letterbox
c) Smart Object Placement

In this post, particularly, I will demo a quick and an easy approach - Stretching the stage. Just in case you are still getting stuck with the guides, here's a simple working solution for your reference (which i actually use it in all of my games :))


public class myGame extends Sprite
{
    private var mStarling:Starling;
    public function myGame()
    {
        super();
           
        // support autoOrients
        stage.align = StageAlign.TOP_LEFT;
        stage.scaleMode = StageScaleMode.NO_SCALE;
           
        var screenWidth:int  = stage.fullScreenWidth;
        var screenHeight:int = stage.fullScreenHeight;
        var viewPort:Rectangle = new Rectangle(0, 0, screenWidth, screenHeight)
           
        mStarling = new Starling(Game, stage, viewPort);
        mStarling.stage.stageWidth  = 640;
        mStarling.stage.stageHeight = 960;
           
        // set anti-aliasing (higher the better quality but slower performance)
        mStarling.antiAliasing = 1;
           
        // start it!
        mStarling.start();
    }

}

What is actually done is that, in the codes, i have defined my default device to be a screen with the width = 640px and the height = 960px (ratio w:h = 2:3). With this, all my game elements (buttons, background images, etc) would be designed based on this resolution. Then, if the game is loaded into a device with a different screen size (and pixel density), the Starling would help me re-size accordingly. It could be a compromise, but it will effectively save you a lot of time.

Isn't that easy and convenient compared to that in the Java Eclipse?

Sunday, November 10, 2013

Generate non-repeating random numbers for games in actionscript AS3

When creating games, the random number generation is one of the important elements to avoid a monotonous game play experience.

Generally, it is straightforward to create a random number in actionscript AS3 (Simply use the built-in Math.random() function). But the question is, how to generate a list of random numbers, without any repetition? I used to be a PHP programmer. With PHP, it has an elegant approach with just 2 lines:

$numbers = range(m, n); //manually generate an array storing a list of numbers ranging from m to n
shuffle($numbers); //yes, we have it shuffled already~

Unfortunately, we don't have a similar solution in AS3...
Instead, the solution is:

var arrWanted:Array = [m, m+1, m+2, ... , n]; //manually generate an array storing a list of wanted numbers
var arrRandom:Array = new Array();
while(arrWanted.length > 0)
{
   var intRandom:int = Math.random()*arrWanted.length;
   arrRandom.push(arrWanted[intRandom]);
   arrWanted.splice(intRandom,1);
}

The idea is that, from the wanted list of number, we randomly pick any of them, while reducing them at the same time. In the end, we have our arrRandom filled with a list of random numbers.

I realize that this problem has been solved by others. In this post, particularly, i would like to add a real example of using the non-repeating random numbers generation as well.

Generate random non-repeating cards in Big 2 (Big Two) Card Game


Big 2 (Big Two) is a popular Poker Card Game involving 4 players. At the beginning of each round, each player is provided 13 cards (which total up to 52). In reality, the cards are distributed one by one, clock-wise. However, when dealing with the cards distribution in coding, we could simply apply the random numbers generation stated above.

Let's rewind the codes (AS3 part). With a little bit modification, we would have our jobs done easily.

var arrWanted:Array = new Array();
for(var i:int=0;i<52;i++)
{
  arrWanted.push(i);
}
 

var arrRandom:Array = new Array();
while(arrWanted.length > 0)
{
   var intRandom:int = Math.random()*arrWanted.length;
   arrRandom.push(tmpArr[intRandom]);
   arrWanted.splice(intRandom,1);
}

var arrPlayer1:Array = new Array(); 
var arrPlayer2:Array = new Array();
var arrPlayer3:Array = new Array();
var arrPlayer4:Array = new Array();
for(i=0;i<arrRandom.length;i++)
{
  if(i<13)
  {
    arrPlayer1.push(i);
  }
  else if(i<26)
  {
    arrPlayer2.push(i);
  }
  else if(i<39)
  {
    arrPlayer3.push(i);
  }
  else
  {
    arrPlayer4.push(i);
  }
}

At the end, we have our arrays ready. Each array stores a list of 13 numbers which represent the Poker Cards.

Sunday, October 20, 2013

How to save data/records of the Android Games in Adobe AIR AS3?

Throughout the game play (either Android Game or others), the player's record is important to be always updated in order to let him/her continue the previous checkpoint. From the complicated RPG Games (levels, equipments, cash left, etc) to the simple mini games (high score, number of attempts, number of stages unlocked), records are necessary so that the players need not start all over again every time they engage the game.

In fact, the feature of saving data/records of the Android Games in Java is available here. The question is, how to implement the same thing in Actionscript 3?

1. import flash.net.SharedObject
The code which is similar to the SharedPreferences in Java is the "SharedObject". To use it, you need to import the flash library.

import flash.net.SharedObject

2. Define a SharedObject variable and a Record name
Define a variable named "shared" at which the records would be stored. You can provide any "RECORD_NAME" to create a shared object.

private var shared:SharedObject = SharedObject.getLocal("YOUR_RECORD_NAME");

 3. Define your data in Object datatype and store it inside the 'data'

The "data" member of the SharedObject is nothing different from the datatype "Object" - an associative array. You can easily define your records in "Object" datatype before storing it.

For example, to store the levels, hit points, mana point of a character, the codes would be as below:

shared.data.characterData = {"level":5, "hit_point":100, "mana_point":100"};
 
In short, it isn't hard to have a data saving feature in your Android Game. So, next time when designing the game architecture, remember to have this feature included.

Saturday, October 19, 2013

How to solve "unsupported sampling/frequency" of audio files in AS3 (Starling Framework)?

As mentioned in the previous post, it is pretty straightforward to load audio/sound files in Starling Framework. But the thing is, it is annoying to learn that the adobe Flash Builder only allows to import the audio files that are recorded in the multiple of 11kHz (11kHz, 22kHz, 44kHz). And if it is not, you will get the error similar to the message below:

Description:
- Internal error in outgoing dependency subsystem, when generating code for ... : java.lang.NullPointerException
- The frequency 0 is not supported in file....

So, how to solve this "unsupported sampling/frequency" issue? (we are not sound engineers right?)

Solution: Manually down-sample/up-sample the audio/sound files


At the moment, I suggest using a third-party audio editor software, such as GoldWave to manually edit the sampling rate of your audio/sound files. (I personally hope that someone would make a browser-based version of that functionality)

To use the GoldWave, you could simply open your audio/sound files with it, and "Save as" a file in the "mp3" format, choosing any option which is in the multiple of the 11kHz frequency. (Here, i pick Layer-3 (LAME), 44100 Hz, 128kpbs, stereo.)


Once you have saved it, you can re-embed your audio/sound files again. :)