Thursday, December 5, 2013

How to set the frame rate in the Flash Builder Actionscript project?

In some of the games such as Tower Defense or RPG, a consistently high frame rate is necessary to maintain a smooth display of the animations. By default, an Actionscript project in the Flash Builder has a frame rate of 25. This is barely enough for a few movements on the screen. If there are tonnes of bullets or enemy armies bombarding the screen display, the players will experience a horrible game play experience (and most importantly, rate your game badly....)

So, setting the game frame rate is necessary. To do that, you need to include a simple SWF meta tag above your class definition (and AFTER your library import), as stated below:

package
{
    import flash.display.Sprite;
    import flash.display.StageAlign;
    import flash.display.StageScaleMode;
    import flash.geom.Rectangle;
   
    [SWF(frameRate="60", width="640", height="960",backgroundColor="0xffffff")]
    public class YourGame extends Sprite
    {
        public function YourGame()
        {


           ....

In the code, make sure you have your SWF meta tag written just before your Class. Here, a frame rate of 60 is chosen. Apart from the frame rate, you can set other configurations as well, such as width, height, background color, etc.

One thing to note is that, the effect of the frame rate "may not" be reflected if you are in the debugging mode with the Adobe AIR simulator. Therefore, don't be surprised if you still observe some lagging when debugging the game. Everything will be alright when you "Export Release Build".

Tuesday, December 3, 2013

How to crop an image with the Starling Framework?

So this is the post of how to perform image cropping on run-time in Starling Framework (AS3).

Allow me to grab any random image from the web for demo purposes, as below:


Question: how to crop the car image above? (Its original size is 300px width, 150px height). The final result is only the center car image.

The action is similar to cropping it with Microsoft Office Picture Manager, as shown below:

But how is it done in AS3 code?

First, let's have a look at the important function setTextCoords stated here.
Sets the texture coordinates of a vertex. Coordinates are in the range [0, 1].

To put the explanation of the function in a clearer picture:

Here, the vertex ID (first parameter) of a picture starts from top left, which is 0.
vertex ID 1 - Top right
vertex ID 2 - Bottom left
vertex ID 3 - Bottom right

Then, the coordinates (second parameter) simply means at which point of the image should the vertex be located. The allowed coordinates are in the range of [0,1]

So, let's see how we want to crop the image. As we can see above (the picture of Microsoft Office Picture Manager), i crop the image with the following criteria:
a) Left: 50px
b) Right: 50px
c) Top: 35px
d) Bottom: 10px

By converting them into the proper value (from 0 to 1), now we have:
a) Vertex 0th: (50/300, 35/150)
    - coordinates (1/6, 7/30)
b) Vertex 1st: ((300-50)/300, 35/150)
    - coordinates (5/6, 7/30)
c) Vertex 2nd: (50/300, (150-10)/150)
    - coordinates (1/6, 14/15)
d) Vertex 3rd: ((300-50)/300, (150-10)/150)
    - coordinates (5/6, 14/15)

Hence to crop the image with AS3, we just need the few lines below:

var bitmap:Bitmap = new car(); //assume you have embedded the car image
var myTexture:Texture = Texture.fromBitmap(bitmap);
var img:Image = new Image(myTexture);
img.setTexCoords(0, new Point(1/6, 7/30));
img.setTexCoords(1, new Point(5/6, 7/30));
img.setTexCoords(2, new Point(1/6, 14/15));
img.setTexCoords(3, new Point(5/6, 14/15));
addChild(img);

Isn't that easy? At last, remember to set the width and height of your final image. Else, the cropped image will have the size similar to the original one (which would be undesirable).

Wednesday, November 27, 2013

How to handle multiple resolutions / multiple screen sizes with the Starling Framework?

One of the great reasons that i choose Adobe AIR and Starling Framework as my favorite tool to create Android Games is that, it can be easily customized to support multiple resolutions for multiple screens. Honestly,  if you are going to design and re-size every single image of your games for all the Android devices, it is going to make your life much more miserable...

So, actually the complete guide to support multiple resolutions is stated clearly here, which includes the 3 strategies:
a) Stretching the stage
b) Letterbox
c) Smart Object Placement

In this post, particularly, I will demo a quick and an easy approach - Stretching the stage. Just in case you are still getting stuck with the guides, here's a simple working solution for your reference (which i actually use it in all of my games :))


public class myGame extends Sprite
{
    private var mStarling:Starling;
    public function myGame()
    {
        super();
           
        // support autoOrients
        stage.align = StageAlign.TOP_LEFT;
        stage.scaleMode = StageScaleMode.NO_SCALE;
           
        var screenWidth:int  = stage.fullScreenWidth;
        var screenHeight:int = stage.fullScreenHeight;
        var viewPort:Rectangle = new Rectangle(0, 0, screenWidth, screenHeight)
           
        mStarling = new Starling(Game, stage, viewPort);
        mStarling.stage.stageWidth  = 640;
        mStarling.stage.stageHeight = 960;
           
        // set anti-aliasing (higher the better quality but slower performance)
        mStarling.antiAliasing = 1;
           
        // start it!
        mStarling.start();
    }

}

What is actually done is that, in the codes, i have defined my default device to be a screen with the width = 640px and the height = 960px (ratio w:h = 2:3). With this, all my game elements (buttons, background images, etc) would be designed based on this resolution. Then, if the game is loaded into a device with a different screen size (and pixel density), the Starling would help me re-size accordingly. It could be a compromise, but it will effectively save you a lot of time.

Isn't that easy and convenient compared to that in the Java Eclipse?

Thursday, November 21, 2013

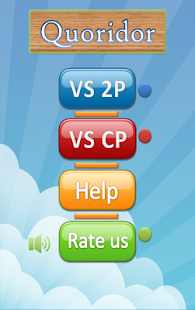
Quoridor Board Game - Lessons and future improvement


Few months ago, I published the Quoridor Board Game, with the promise that, if the user rating exceeds the threshold of 30, I would further improve the game. Today, you guys really make it... (btw, is that a coincidence?). And I would spend more time and efforts into polishing this board game.

The truth is, before it reached 30, a number of enhancement has been made, from time to time, especially on the user interaction parts. Yet, I am aware that it still has room for improvement. Here, I would like to briefly summarize what it lacks of, and what should be possibly improved.

1. Computer AI (Artificial Intelligence) difficulty

Honestly, the current Quoridor computer is still too weak to be taken as a training. A number of players have complained for this. This is my first priority. And i see my competitor could make it as well. So, no excuse. Just a matter of time.

2. User's friendliness

In order to squeeze a 9 x 9 matrix board into mobile devices (plus walls and others), it is undoubtedly a challenging task. This is especially significant when the player is required to drag and place the walls. The existing version has been designed such that when the wall is moved around, the surrounding tiles are highlighted to make the movement clearer. Apart from that, some users request that it would be greater to add a 'confirm' button, to be able to 'revert' in case there is a typo made accidentally. Guys (and girls), i copy that!

3. Undo feature

This is another challenging feature which greatly tests the programming skills of the game creator. I am not sure if this is needed. But nothing to lose if it is getting integrated.

4. Challenge other players Online

Definitely, this is a very demanding feature. Playing with computer all the time would be too boring... However, i set no date for this feature to come true, yet. After all, without the sufficient amount of players, this feature could hardly impress anyone. Moreover, enabling the Online Challenge Mode would cost. (Maybe i should wait until the number of rating exceeds 100? :p)


Updated on 30th Nov 2013:
- A Hard Mode is added to the latest release.
- An Undo feature is added. This might help address the issue of 'wrong wall placement', while helping the players to have a better analysis of the computer AI's game play.
- You can choose which player to start first through the green Setting button.

Friday, November 15, 2013

How to add Admob ANE into the Flash Builder project?

If you are first time integrating Adobe Native Extension (ANE) into the Flash Builder project (here, i demo an Andoid project), I bet you would have encountered some issues during debugging.

In this post, particularly, I would like to talk about adding Admob into the Flash Builder project. Since the Admob doesn't officially provide the ANE, here I am using the third-party one in the demo.

 If you have come across the error message such as:

VerifyError: Error #1014: Class so.cuo.anes.admob::Admob could not be found.

OR the error pop up similar to:

Error: Requested extension so.cuo.ane.Admob could not be found.


 then this is the right place to look for.


To revise, there are 2 steps to properly add an Adobe ANE into the Flash Builder (here, it is Admob ANE):

Step 1:

Go to Project Tab -> Properties -> Actionscript Build Path -> Native Extensions -> Add ANE


Step 2: (Which is most of the time overlooked by the beginner)

Go to Project Tab -> Properties -> Actionscript Build Packaging -> Google Android -> Tick the Checkbox of the Package


If you miss the step 2, you will face the errors mentioned.

One more thing, unlike using the Admob jar library in the Java project, the one provided by the third-party doesn't support Admob Ads in the debugging mode. You could only 'see' the Ads coming out if you "Export Release Build".

***Updated***
Following the link provided by Mike Monti, I am also able to display the Admob Ads.
One thing to remind is that, remember to add the following in your xml tags:
<meta-data android:name="com.google.android.gms.version" android:value="4323000"/>
<activity android:name="com.google.android.gms.ads.AdActivity" android:configChanges="keyboard|keyboardHidden|orientation|screenLayout|uiMode|screenSize|smallestScreenSize" />
To produce the Banner ads, you can simply follow the code below:

var adMobManager:AdMobManager = AdMobManager.manager;
if(adMobManager.isSupported)
     {
          adMobManager.bannersAdMobId = "ca-app-pub-xxxxxxxxxxxxxxxx/xxxxxxxxxx";
          adMobManager.createBanner(AdMobSize.SMART_BANNER,    AdMobPosition.BOTTOM_CENTER,"BottomBanner",null,true);
          adMobManager.showAllBanner();
      }

Hope this helps.